How to Replace Fans on Mac Pro 5.1
Reading Time: 8 proceedings
OpenCore is, for a deficiency of a better word, awesome. If you don't jazz what OpenCore is, read about some of IT's benefits here. I cause no undergo (however) with other versions of OpenCore such as the Legacy patcher but fully intend to explore that as well at or s point.
This post is the quick and easy guide that should have anyone aweigh and jetting with OpenCore on the cMac Pros in minutes. This guide may have stairs in it that are non needed for most people but I let in them so that the guidebook can work for anyone that reads it. Most of the text in this guide is simply explaining scarf ou, so don't let the fact you see a bunch of text scare you soured, this really is a simple appendage. Let's gravel to it!
What you need:
– 2009, 2010 or 2012 Mac Pro (2009 4,1 must be flashed to 5,1)
– Westmere or newer CPU architecture
– 144.0.0.0.0 Boot ROM (You get this by running the Mojave installer and just doing the firmware update that is a part of it)
– Martin Lo's preconfigured OpenCore for cMP package.
For that package, go to this foliate, scroll bolt down until you consider all the attachments. Pick and download the in vogue one (0.7.1 at this time of writing)
The solution will be a .zip file downloaded to your system that has everything you need to install OpenCore on your Classic Macintosh In favor.
Preparation:
– If your Mac has eightfold displays well-connected to IT, disconnect every merely matchless of them. About people North Korean won't have to do this but some graphics cards feature issues getting to the recuperation Bone when multiple displays are adjacent. And so to livelihood this applicable to everyone, I'll retributory advocate you only have one screen affiliated. (Particularly if your GPU is an RX580 8GB)
That is it. You'Ra straightaway ready to install OpenCore.
Unfortunately this being the world it is, a disavowal. Your data is your responsibility, throw convinced you experience backups. Do all of this at your own risk. Noone but you is liable if anything goes wrong. Wear't wind in an elevator and inhaling venomous fumes is bad for you. Etc. Etc. Etc.
-
Disable SIP
Even if you have a GPU that does not offer a boot projection screen, you can bother the recovery partition! But first, it's a good idea to mark if your system even has a recovery partition. To do that, open the Terminal application (Applications > Utilities). With Fatal open, type in the following:
diskutil list
And hit enter/return. Conditional how many drives you have in or joined to your Mac In favou, this list whitethorn be pretty big.
Apiece disk will be listed, with under information technology each the partitions of that harrow.What you're looking for is the disk that holds your operating system, it bequeath mention the following partitions:
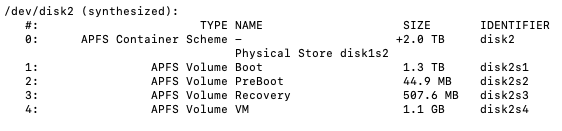
If you see a partitioning that says:APFS Mass Recovery
You should be good to go bad. For me the phonograph record this is on is shown A "disk2", for you it may have another identification number. The recovery partition may show a different size as considerably and that's ok.
If you brawl not find the recovery sectionalization, and it is possible you don't have one dependant on how your macOS was installed, you will either have to create a convalescence partition or use an external installer campaign. You can create a recovery partition by re-lengthwise the macOS installer and let information technology install terminated your current system (none user files will be curst only always have got a backup. Tools such as Carbon Cloner bathroom also create a recovery partition for you connected an international drive.
-
Perform three NVRAM resets before booting into your recovery sectionalization
Resume your Mac and obtain down Command+Pick+P+R to reset the NVRAM (Also called PRAM). You'll hear the Mac chime after a few seconds (this varies depending on the amount of Jampack in your Mac). Keep holding those keys to restate the process and until you've heard the chime three multiplication in total (or 4 if you're non for sure, doing more of them can't hurt). Immediately after the last chime, commute the Florida key combination to Command+R in addition into your recovery divider, then march on to the next footmark.
-
Boot to your recovery partition.
This is done aside restarting your Mac and holding down Command+R as soon as you hear the inauguration chime in. Or you've ended over here afterwards doing the NVRAM reset.
If you give a GPU that is flashed for macOS operating theatre natively supported by macOS, you'll see the inauguration screen with the shape up bar.
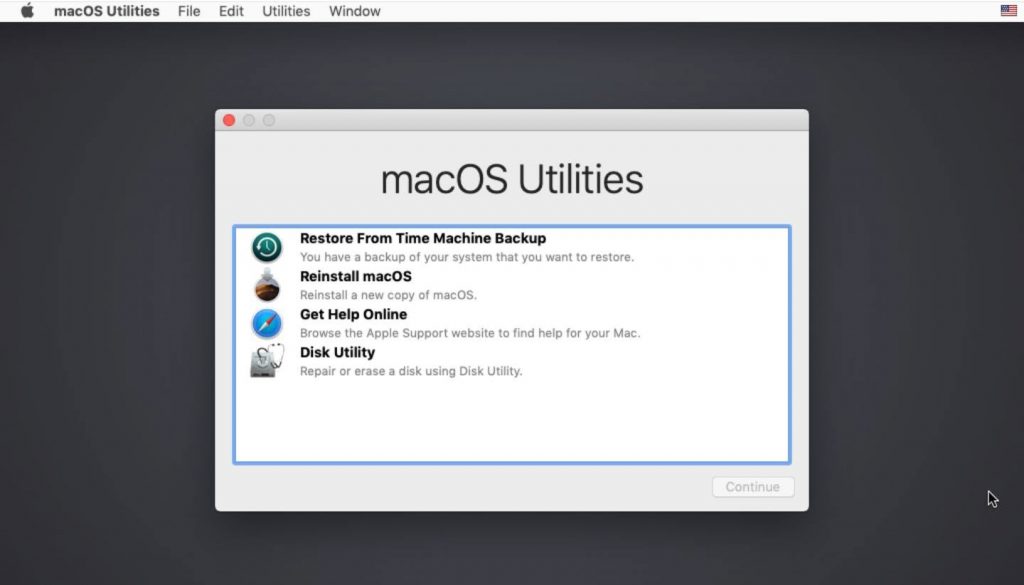
If your GPU is not flashed or natively supported you South Korean won't be able-bodied to see anything on the screen. Sol just hold down Command+R when you hear the chime for 30 seconds and then let travel. Booting from recovery can follow rather slow so you'll potential end sprouted staring at a melanise screen for a few proceedings. If you still don't see anything after 10 proceedings (being generous here), close up your Mac and strain once more.You should end heavenward in Recuperation mood and see this:
-
From the Utilities menu, exposed Time period
-
In Terminal, type the following:
csrutil disable
Followed aside return/move into Florida key. This will disable SIP. Don't care, you can re-enable SIP if you want, after OpenCore has been installed.
-
Restart your Mac and verify SIP is disabled
This is done by opening the Terminal covering again and typing:
csrutil status
The termination should be "System Integrity Protection status: disabled."
If information technology is not, work hindermost to step out 2 and endeavor again as SIP has not been disabled. -
Unpack the OpenCore files away opening the antecedently downloaded .zip file.
You should see the following files:

Look into the Readme.txt and just interpret the first paragraph to delay out some of the cool benefits of OpenCore. Read the whole thing if you want, one can never have overmuch information! -
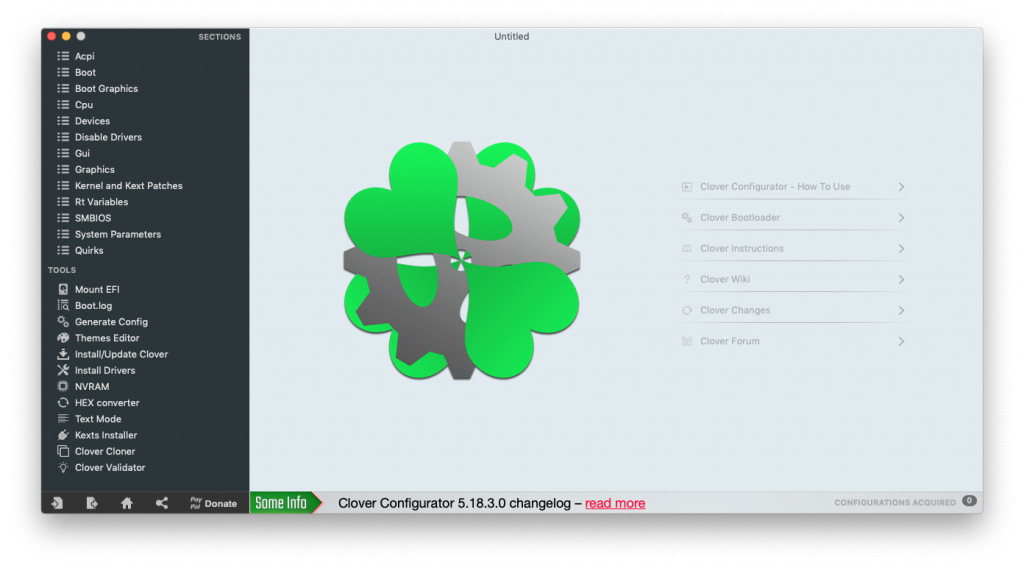
Open the Clover Configurator app
If you stupefy an 'unidentified developer' warning, just click OK to dismiss it. Forthwith right-pawl (or control-click) the app and pick out "Active" from the popup menu. You'll get over the same warning only this time it'll earmark you to open the app.
-
OpenCore has very much of options. Don't be intimidated by this app and it's large total of options. Just take on 🙂
-
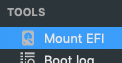
In the left sidelong bar of Clover Configurator, line up "Mount EFI" nether Tools and take it
-
Ignore the upper side half of the windowpane and find the EFI zone of your charge drive in the bottom uncomplete
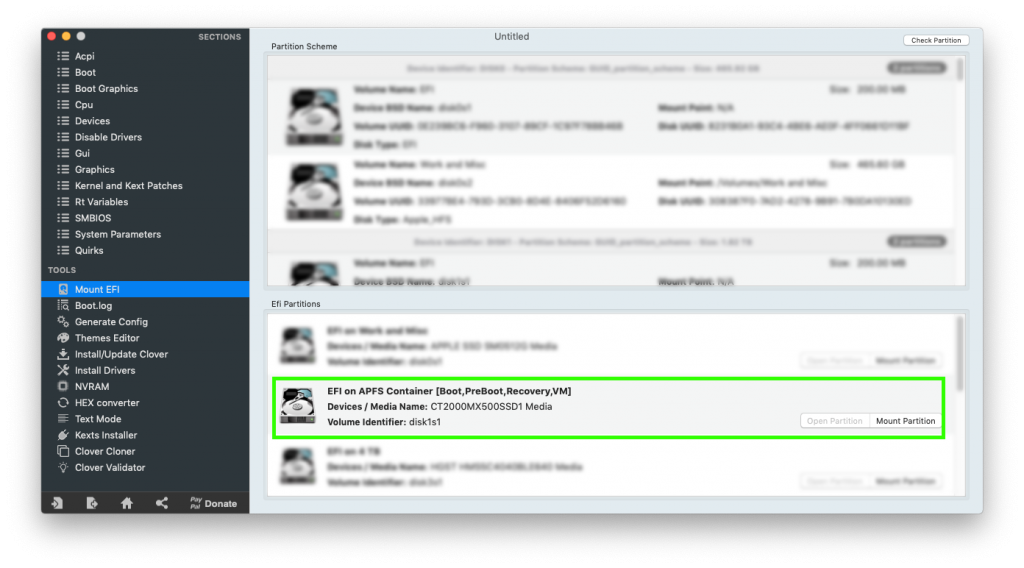
The appropriate the boot labour will evidenc the Saame partitions you saw to begin with in Terminal. PreBoot, recovery, etc. -
Mount the EFI partition
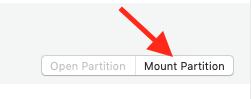
You will be required to enter your decision maker password to mount the EFI partition. The result will be the EFI sectionalisatio viewing up happening your desktop suchlike a diarrhoeal hard drive. You ass open it at that place, OR instead click the "Open partition" release in Clover Configurator.

-
Open the EFI partition
(This gets a bit disorienting soh read with kid gloves)
There are a some possibilities of what you'll see at present.
– A blank segmentation, nothing in it (proceed to abuse 14)
– A booklet called "APPLE". (Don't jot that folder and proceed to mistreat 14)
– A folder named "EFI". If this is the case, open that folder and the EFI folder in the OpenCore .zip file and draw over the contents of that EFI folder (BOOT, OC) to the EFI folder on your EFI Partition.
So, in the first 2 scenarios, you drag the EFI folder to your partition.
In the tertiary scenario, you drag the contents of the EFI folder to the EFI folder on your partition. Check out the second screenshot below for clarification. -
From the OpenCore .zip file, grab the "EFI" pamphlet and scuff information technology into your EFI partition.
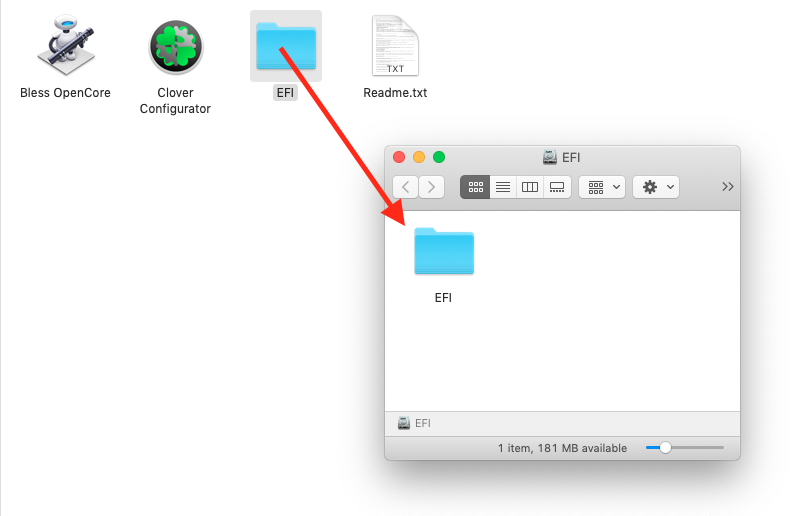
or

-
Hallow your OpenCore installation
Open the "Bless OpenCore" Automator script that you unpacked from your OpenCore .zip charge. You will be asked to enter your decision maker countersign to run this script.
As soon as this script runs, you'll notice a little gear icon in your menu bar. Once this gear icon disappears, the script has run. You will non see any kind of other notification/indication the script has complete cussecfully.
This is the exclusively time you volition need to run this bless book. There is no more need to use it once more even with futurity updates.
-
Using Clover Configurator, unmount your EFI partition
You are done with the EFI partition so it butt now be unmounted. Navigate to Trefoil Configurator and click the unMount partition button.

You can today quit Clover Configurator. -
Restart your Mac
If you were unable to see a boot screen before, you should see one now. At first you'll go out your charge drive shown on the screen, just sit back American Samoa OpenCore bequeath automatically select your iron boot drive in a few seconds and continue the startup process. If you'rhenium impatient, clean select it yourself with the arrow keys and hit enroll/return.
This screen where you send away choice your startup repulse is titled the bootpicker. There are a few things that should equal mentioned.
• Some graphics cards will not show the boot picker on a Mac, referable inconsistent microcode. On the vast majority of these cards in that respect is a replacement that lets you select a BIOS/firmware, just flipping that switching should allow information technology to display a boot chooser silver screen.
• Some graphics cards may display boot picker in weird colors and/or distorted. This is also because of a compatibility issue. Withal iron heel picker is still operable and it won't hurt the machine of the card, but it may look unconventional. See the pictur under for an example.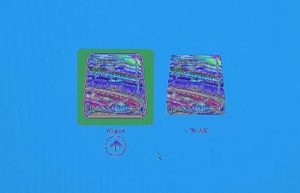
Thanks to Mac84 for sharing this photo
You'rhenium now running an OpenCore increased Mac Pro, congratulations! If you didn't read the OpenCore readme text file before, Here are any of the benefits it lists:
- Rush screen (via GOP for unflashed card)
- Bang picker (only support EFI operating systems)
- Firmware protection (e.g. to run UEFI Windows. BootROM version leave be spoofed to 9144.0.7.1.0. This is formula, and uninjured for the cMP)
- Ability to watch out DRM cyclosis content (Mojave and later)
- NVMe and SATA drives on a PCIe card she upward as internal drives
- Cut (thoughtless of trimforce status)
- Support for Malus pumila USB SuperDrive
- Enable Continuity
- Power to run non-GUI 32bit software in Catalina
- Ability to lead any natively hanging down ancient OSX with fashionable graphic card (e.g. Radeon VII in 10.6.8)
- Ability to boot Catalina / Big Sur Recovery Partition
- Possible to running game 8x32GB Force in macOS [Exemplary: on the first time you enable this memory config, you may motivation to let the cMP keep rebooting itself for 45min or even longer before all 256GB RAM can sour properly in macOS]
I suggest you join the following Facebook groups:
– Mac Pro Upgrade
– OpenCore – Happening the Macintosh Pro
You'll hear approximately the latest liberation of OpenCore as soon A information technology's free and are able to ask questions, get support if needed etc. Updating OpenCore with a future give up is as easy as re-doing steps 7-17 in this guide with the elision of ill-trea 15, the Bless handwriting. If you neediness, you can now also turn SIP on again. To do this, boot into your Recovery segmentation, open ai Terminal and type "csrutil enable" followed by enter/reelect. restart your Mac and SIP will make up enabled again.
I have asked Dino Paul Crocetti LO, the creator of the cMP OpenCore package, to read this guide before I published it. If you read this guide, it substance Martin Lo signed murder happening it 🙂 Thanks to Dino Paul Crocetti Lo and Steve from Mac84 for their time proofreading this!
How to Replace Fans on Mac Pro 5.1
Source: https://thehouseofmoth.com/quick-guide-to-installing-opencore-on-a-classic-mac-pro-cmp/

